Infrared photos – How is it done?
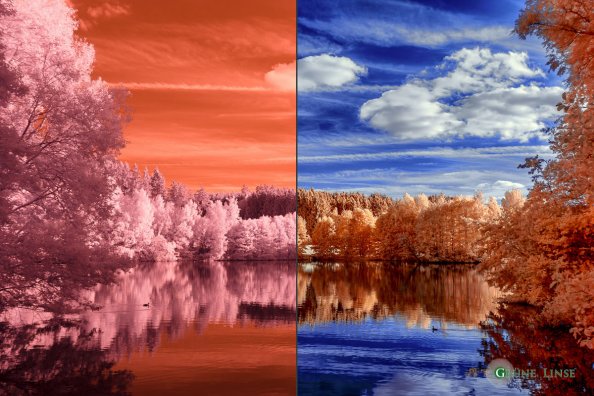 As I have been asked already many times how these infrared photos (Eremitage, Bayreuth, Pfaffenteich, Stadtweiher) are made and if I get them directly out of the camera like this, I will reveal the “secret” behind them. 😉
From the original photo out of the camera until the final infrared photo it is quite a long way. I will show you all important steps one after the other and always on the example photo above from the Untreusee.
Actually it is only my personal way of processing the infrared photos and maybe there are more easy and more effective possibilities. I will not go too much into details with specific settings as they vary from photo to photo, but talk more about the general procedure. Anyway I hope that for some of you this will prove helpful and answer some questions!
But before just some more words to colors in infrared photos. As the infrared wavelengths are invisible to the human eye, the obviosly have no color for us. Therefore, every colored infrared photo is “wrong” as there is no correct color choice and thus I consider the addition of colors as choice of the artist! 😉
The filter of my camera lets wavelengths above 665nm pass. Therefore, I don’t take “pure” infrared photos, but they still contain some portion of visible light, as the human eye can see wavelengths up to 780nm (dark red). That is why also the original photo already contains some slightly different color tones, which are then modified and intensified during the following process.
Picture 1: Original photo of the camera
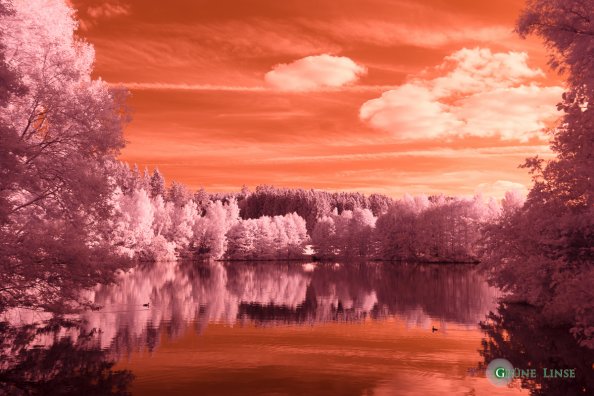
More or less like this looks the infrared photo in the camera. Most cameras already offer the possibillity to set a manual white balance directly in the camera. If you have already done this, then the original from the camera would look more like picutre 2. For setting the white balance in infrared photos you always choose something green, like leaves, trees, grass or something similar.
Picture 2: White balance

After correctly setting the white balance the leaves should look relatively bright and more or less white. The sky will always keep an slightly reddish tone.
Picture 3: First Lightroom corrections
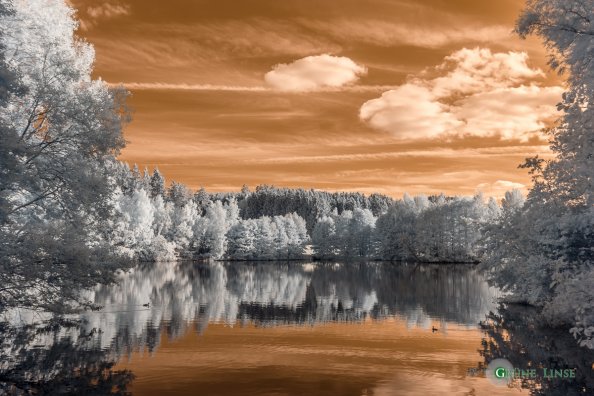
Now the processing of the image starts already in Lightroom itself. There I mostly use only the basic adjustments and as follows: Highlights (very negativ), Shadows (very positiv), White (slightly positiv), Black (slightly negativ), Clarity (very little positive) and Dynamic (slightly positiv). Of course one could already use the lens corrections function and reduce cromatic abberations, but this also varies between the lenses you use.
Picture 4: Channel Mixer (Photoshop)
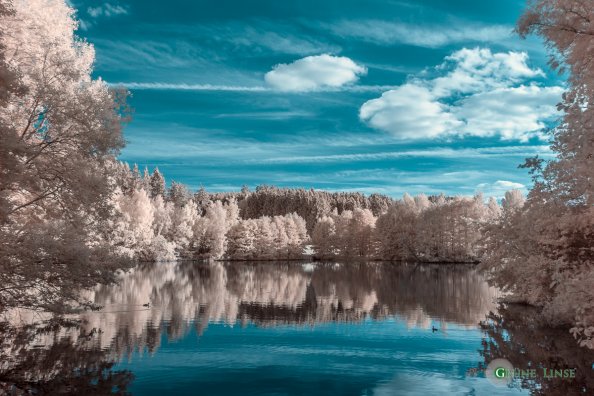
After this the processing continues in Photoshop, where I first use the Channel Mixer. With it the blue and red color channel is exchanged. By this the sky becomes blue again, which looks to the human eye just more “normal” than the original reddish tone!
Picture 5: Levels (Photoshop)
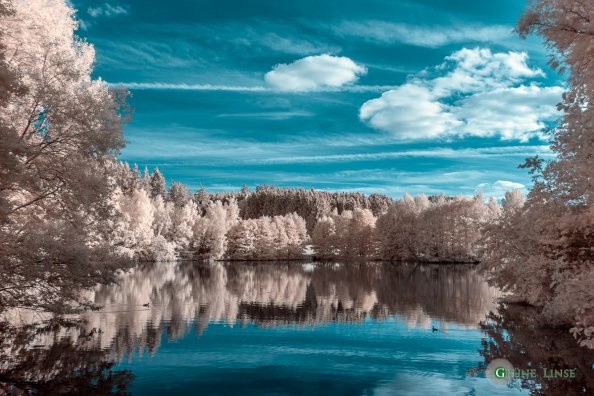
By adjusting the Levels the photo becomes more intense and the colors more vivid. Unfortunaly in my example photo this step is barely recognizable! 🙁
Picture 6: Hue/Saturation (Photoshop)
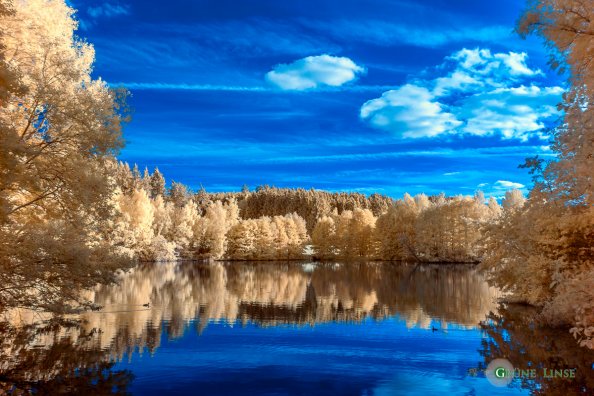
The setting “Hue/Saturation” let you add much more dynamic into the photos. The saturation should be of course increased and then you can play with the hue until the result is to your liking.
Picture 7: Selective Color (Photoshop)
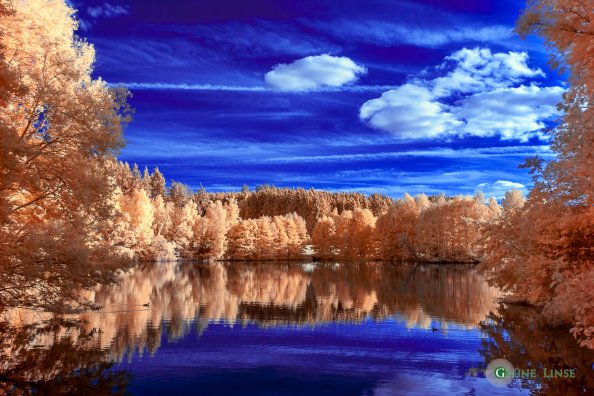
To optimize the blue of the sky and the tone of the leaves the setting “Selective Color” is a good choice. The clouds often look much better when Cyan is reduced pretty much.
Picture 8: Exposure (Photoshop)
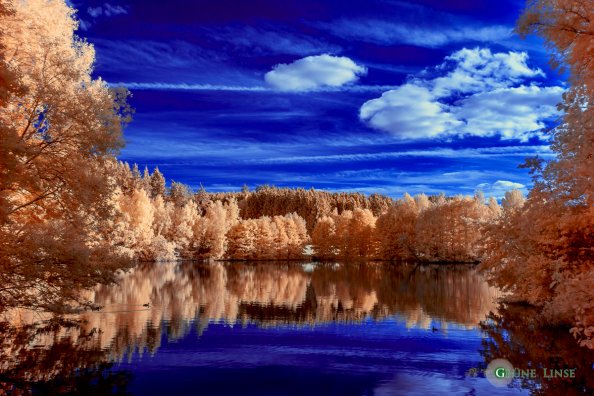
Before exporting the photo from Photoshop I optimize the exposure slightly, which usually makes the photo better.
Picture 9: Lightroom desaturate blue
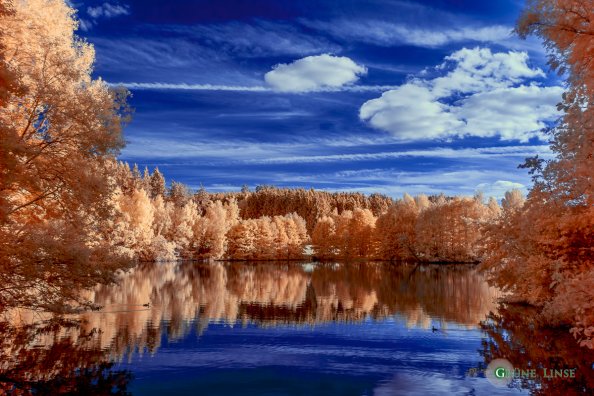
Back in Lightroom the blue tones are mostly to extreme so I simply reduce the saturation of the blue tones.
Picture 10: Local optimisation with NIK Vivea
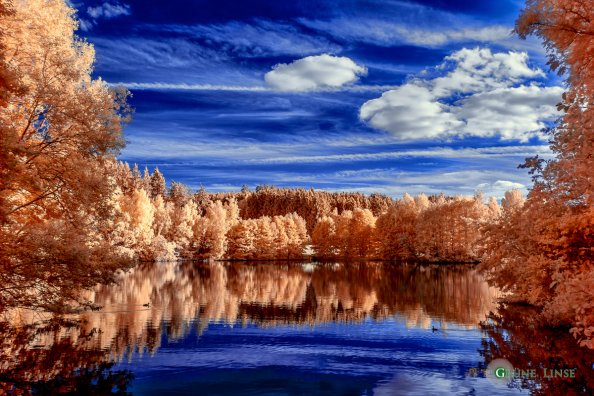
With the Software Viveza from NIK you can wonderfully do local adjustments of brightness, colors and so on. It is also excellent for getting more details in the cloud structures. The software is extremely helpful, but as every photo is different it is hard to give more specific advices.
Picture 11: Final Lightroom corrections
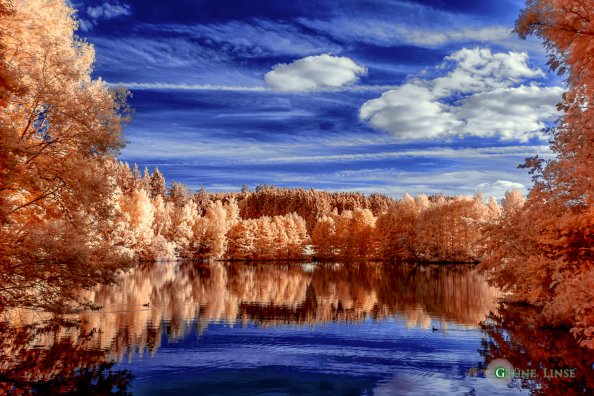
After being finished with Viveza, I mostly do some final optimizations in Lightroom. Often I reduce the Highlights slightly, add some more White and also reduce the clarity slightly.
And now we arrived at the final infrared photo. I hope I could give you some insights and feel free to give recommendations, ask question or whatever, just contact me!


Massimo
Thank you for the informative write-up! A few questions:
1) Do you set the white balance before shooting, or do you find it is enough to refine it when developing the RAW image?
2) Do you have a Full Spectrum camera with a 665nm filter on the lens, or is the 665nm filter replacing the IR-blocking sensor filter?
3) Who did the camera conversion for you?
Cheers,
Massimo
Thorsten
Hello Massimo, I prefer to shoot in RAW and so setting white balance in camera is not necessary. Nevertheless I have done it, because then also the LiveView Picture looks much better! The 665nm filter is permanently replacing the IR-blocking filter, so the camera can no longer be used in a “normal” way. The conversion I made at dslr-astrotec.de which did a good and economic job.
Good start in the week,
Thorsten
Philip Whittaker
Hey Thorsten, seeing your stream on 500px made me decide on going for super colour when i had my Nikon D70 converted permanently. Im still trying to learn the many ways of processing but your work inspires me to keep pushing to get the perfect result Thanks for the guide 😉
Phil
Kai Buddensiek
Hallo Thorsten, bin jetzt mal endlich dazu gekommen, deinen Artikel in Ruhe zu lesen. Echt super geschrieben. Gefällt mir gut. Deine IR Bilder ja eh 😉 Ich brauche einfach mehr Zeit, dann würde ich das auch mal testen. Gruß Kai
Stefanie Loges
Sehr cooler Artikel Thorsten und tolle Bilder rundherum um diese Site :))